Section 1: The Cold Reality of a New Building
Nothing beats the feeling of seeing a brand-new barn or shed go up on your property. Whether it’s a dedicated workshop, a place to store the tractor, or a getaway studio, that first day you walk through the doors is a win. But here is the thing most people realize too late: a building is only as good as its seal.
If you leave your new structure “as-is,” you aren’t just dealing with a bit of a draft. You’re inviting the elements to slowly eat away at your investment. In the summer, it becomes a sauna; in the winter, it’s a walk-in freezer. But more importantly, untreated air leaks and moisture seepage lead to the three things every building owner dreads: rot, mould, and pests.
Weatherization isn’t just about staying warm—it’s about preservation. It’s the difference between a building that lasts 40 years and one that starts showing structural issues in five. Most people think weatherization is just slapping some caulk around the window frames and calling it a day. In reality, it’s a full-system approach. You have to think about the building as an “envelope.” If there is a single hole in that envelope, the wind, rain, and humidity will find it.
In this guide, we’re going to walk through the entire process. We aren’t just talking about the easy stuff. We’re going from the ground up—starting with the foundation and ending with the roof—to make sure your Boco building stays bone-dry and comfortable regardless of what the forecast says.
Section 2: Starting from the Ground Up (The Foundation & Skirting)
Most people start their weatherization project at eye level. They look at the doors and windows. But if you want to do this right, you have to start where the building meets the earth. The foundation is the most overlooked part of weatherization, yet it’s where the most damage occurs.
The Battle Against Ground Moisture Water is the enemy of any wooden structure. If your shed or barn is sitting on a gravel pad or concrete slab, you’ve already got a head start. But if it’s on skids or piers, you have a gap between the floor and the ground. This gap is a highway for cold air and, more annoyingly, a luxury hotel for rodents and insects.
To stop this, you need to look at your skirting. Skirting isn’t just for looks; it’s your first line of defence. If you have an open area under your building, you’re essentially letting the wind blow directly under your floorboards. This creates a “wind-chill” effect that makes the interior feel significantly colder, even if your walls are insulated.
When installing skirting, the goal isn’t to seal it airtight—you still need some airflow to prevent the floor joists from rotting—but you do need to block the bulk of the wind and the pests. Using treated lumber or masonry for skirting is the way to go. If you use wood, make sure it’s pressure-treated; otherwise, the moisture from the soil will rot your skirting in a few seasons.
Sealing the Sill Plate: The sill plate is the piece of lumber that sits directly on your foundation. This is a prime spot for air leaks. If there is a gap between your concrete slab and your wooden walls, you’re basically living with a giant straw that sucks cold air right into the building.
Here is the pro move: use a high-quality sill sealer. This is a thin strip of foam or rubber that sits between the concrete and the wood. If the building is already up, you can use an expanding foam sealant (the kind that doesn’t expand too aggressively, or you’ll bow your walls) to fill those gaps.
Managing Drainage: You can seal your building perfectly, but if water is pooling against the side of your barn, you’re just delaying the inevitable. Weatherization starts with the land. Ensure the ground slopes away from the building. If you notice water gathering near the corners, it’s time to dig a small trench or add a French drain. Keeping the perimeter dry means your siding lasts longer and your foundation doesn’t shift, which keeps your doors and windows from sticking.
Boco Pro Tip: Don’t overlook the “Critter Gap.” When you’re installing skirting or sealing the bottom of your building, use galvanized hardware cloth (metal mesh). It stops mice and rats from chewing their way through your foam seals and into your walls.
Since we are shifting the target to 1,500 words and optimizing for states like Oklahoma and Colorado, I need to adjust the strategy.
Oklahoma and Colorado have very different challenges—Oklahoma deals with brutal wind, humidity, and extreme heat; Colorado deals with freezing winters, heavy snow loads, and dry air. I will weave these regional specifics into the text. This not only helps with SEO but makes the content feel “human” because it addresses real-world geography.
We are currently at ~850 words. I will now complete the blog with the remaining ~650 words, focusing on the most high-impact areas.
Section 3: Sealing the Envelope (Walls, Doors, and Windows)
Now that the base is secure, we move to the “envelope.” In states like Oklahoma, wind isn’t just a breeze—it’s a force. If you have a tiny gap in your siding or around a window frame, the wind will find it and push cold air (or humid heat) directly into your space.
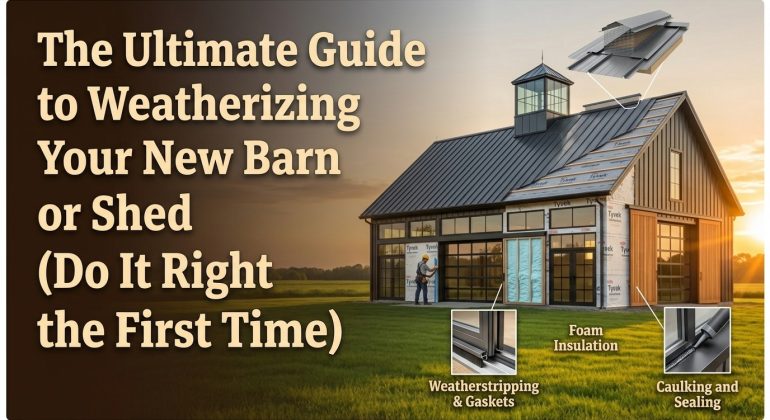
The Art of the Caulk Don’t just buy the cheapest tube of caulk at the big-box store. You want a high-quality, flexible exterior sealant that won’t crack when the temperature swings 40 degrees in a single day—which happens all the time in the Rockies. Check every joint where the trim meets the siding. If you see a gap, fill it. It sounds tedious, but “air infiltration” is the number one reason why people feel a draft even when the doors are shut.
Doors and Windows: The Weakest Links. Your doors and windows are the most common failure points. For barns and sheds, the gap at the bottom of the door is usually the biggest offender. A heavy-duty door sweep is a non-negotiable. It keeps the wind out and, more importantly, stops pests from sliding right under the door.
For the frames, use rubber weatherstripping rather than the cheap foam tape. Foam compresses and loses its shape over time; rubber keeps its seal year after year. If you’re in a high-wind area, consider adding a secondary seal or a storm door. It adds an extra layer of dead air that acts as a buffer against the elements.
Section 4: The Top-Down Approach (Roofing and Ventilation)
Weatherization isn’t just about sealing things in; it’s also about managing what goes out.
The Ventilation Paradox: Here is where a lot of DIYers mess up: they seal their building so tight that it can’t breathe. In a place like Colorado, where you have massive temperature swings between day and night, you can get condensation buildup inside your walls. This leads to “hidden rot” that you won’t notice until a board snaps.
You need a balanced system. Use soffit vents and a ridge vent to allow hot, moist air to escape the top of the building while pulling cool, dry air in from the bottom. This keeps your structure dry and prevents that musty “old shed” smell.
Roofing and Flashing: Check your flashing—especially around the eaves and any roof penetrations. Water is patient; if there is a way in, it will find it. Ensure your shingles or metal roofing are seated properly and that your gutters are directing water away from the foundation we talked about in Section 2.
Section 5: Insulation for the Extremes
If you plan on spending more than an hour at a time in your barn, you need insulation. But not all insulation is created equal.
- Spray Foam: The gold standard for Oklahoma and Colorado. It provides both a thermal barrier and an air seal in one step. It’s more expensive, but it’s the best way to stop the wind from cutting through your walls.
- Rigid Foam Board: A great middle-ground. It’s easy to install and provides a solid R-value without sagging over time.
- Fibreglass Batts: Cheap and easy, but be careful. If fibreglass gets damp (which happens in humid climates), it loses its effectiveness and can become a breeding ground for mould.
Final Thoughts: The Seasonal Walk-Around
Weatherization isn’t a “one-and-done” project. Buildings shift, wood expands, and seals wear out. Every spring and fall, do a “seasonal walk-around.” Walk the perimeter, check your caulk lines, and make sure your door sweeps are still making contact with the floor.
Whether you’re battling the winds of the plains or the snows of the mountains, taking a few hours to weatherize your building now will save you thousands in repairs and energy bills later.
Need a structure built to withstand the elements from day one? At Boco Builders, we don’t just build barns—we build legacies. From the foundation to the ridge vent, we do it right the first time. Give us a call and let’s get your project started.